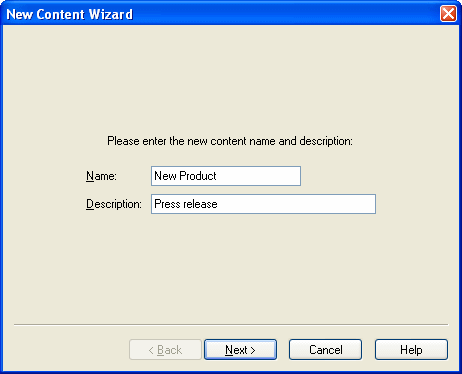
When creating a new project, a new Html content and a new alternate Text content are created by default. However, you can always add new empty contents to your project or import existing content files. From the design window, click on Project/Add new content to launch the New Content Wizard:
Content name has to be single. If the content is an attachment, the attached file name will be built with this name. Description field correspond to the optional MIME header, Content-Description.
Select Empty HTML content, Empty Text content or Empty VBS content to create a new HTML, Text or VBScript content. A corresponding file will be created in the project folder.
Select Content imported from a web page
to create a new content by importing the content of a web page.
Click on
Next and enter the address of the web page to import (i.e.:
http://www.emill.net/newsletter.html).
Check the
Import images and style sheets option to import them in the project folder.
Select Content from an existing file
to import an existing file.
Click on Next and select the file you want to use. If your file is not in the project folder, it is
highly recommended to copy it by leaving checked the Copy file into
project folder box. Otherwise, if you publish your project on a remote eMill Server, the content could be impossible to find and the
render could stop displaying the following error message: The system
cannot find the file specified or Access denied.
This option allows you to configure a web page according to data from the
receivers list. You are also able to render a content from an existing dynamic
web application (intranet, extranet, web services,...).
For more details,
see HTTP Settings.
Select Content linked to
a web page. Click on Next and enter the address of the web page to
link. If the access to the web page requires an authentication, enter the account username and password.
This option allows you to send specific attachments for each receiver.
For instance, if you wish to send reports to your sales people, they will be different for each receiver. Just indicate in which folder the reports are located and which criteria will be used to define which report corresponds to which receiver (report name in a receivers list colum, report name corresponding to the receiver name...).
Select Personalized attachment per receiver
and click on Next.
Click on Folder in order to select the
folder where the attachments to send are located.
Right click in the text
area where you want to insert information from the receivers list. For
instance, if the attachment file name is indicated in one of the list column,
right click at the end of the folder path and select the list column
containing the attachament file names.
Check the Open content properties when I click finish box to open the content properties window after clicking on finish.
© eMill 2001-2015. All trademarks property of their owners.